为什么你买东西都是支付 0.00 元,把我惊呆了
给三档小风扇加红外功能
马上到夏季了,风扇要开始上班了,发现风扇都不带遥控,突发其想,加个红外不香吗?
## 准备:
### 小风扇一个,带电路板的12V的同理也可以这样改

### 小风扇电路小板
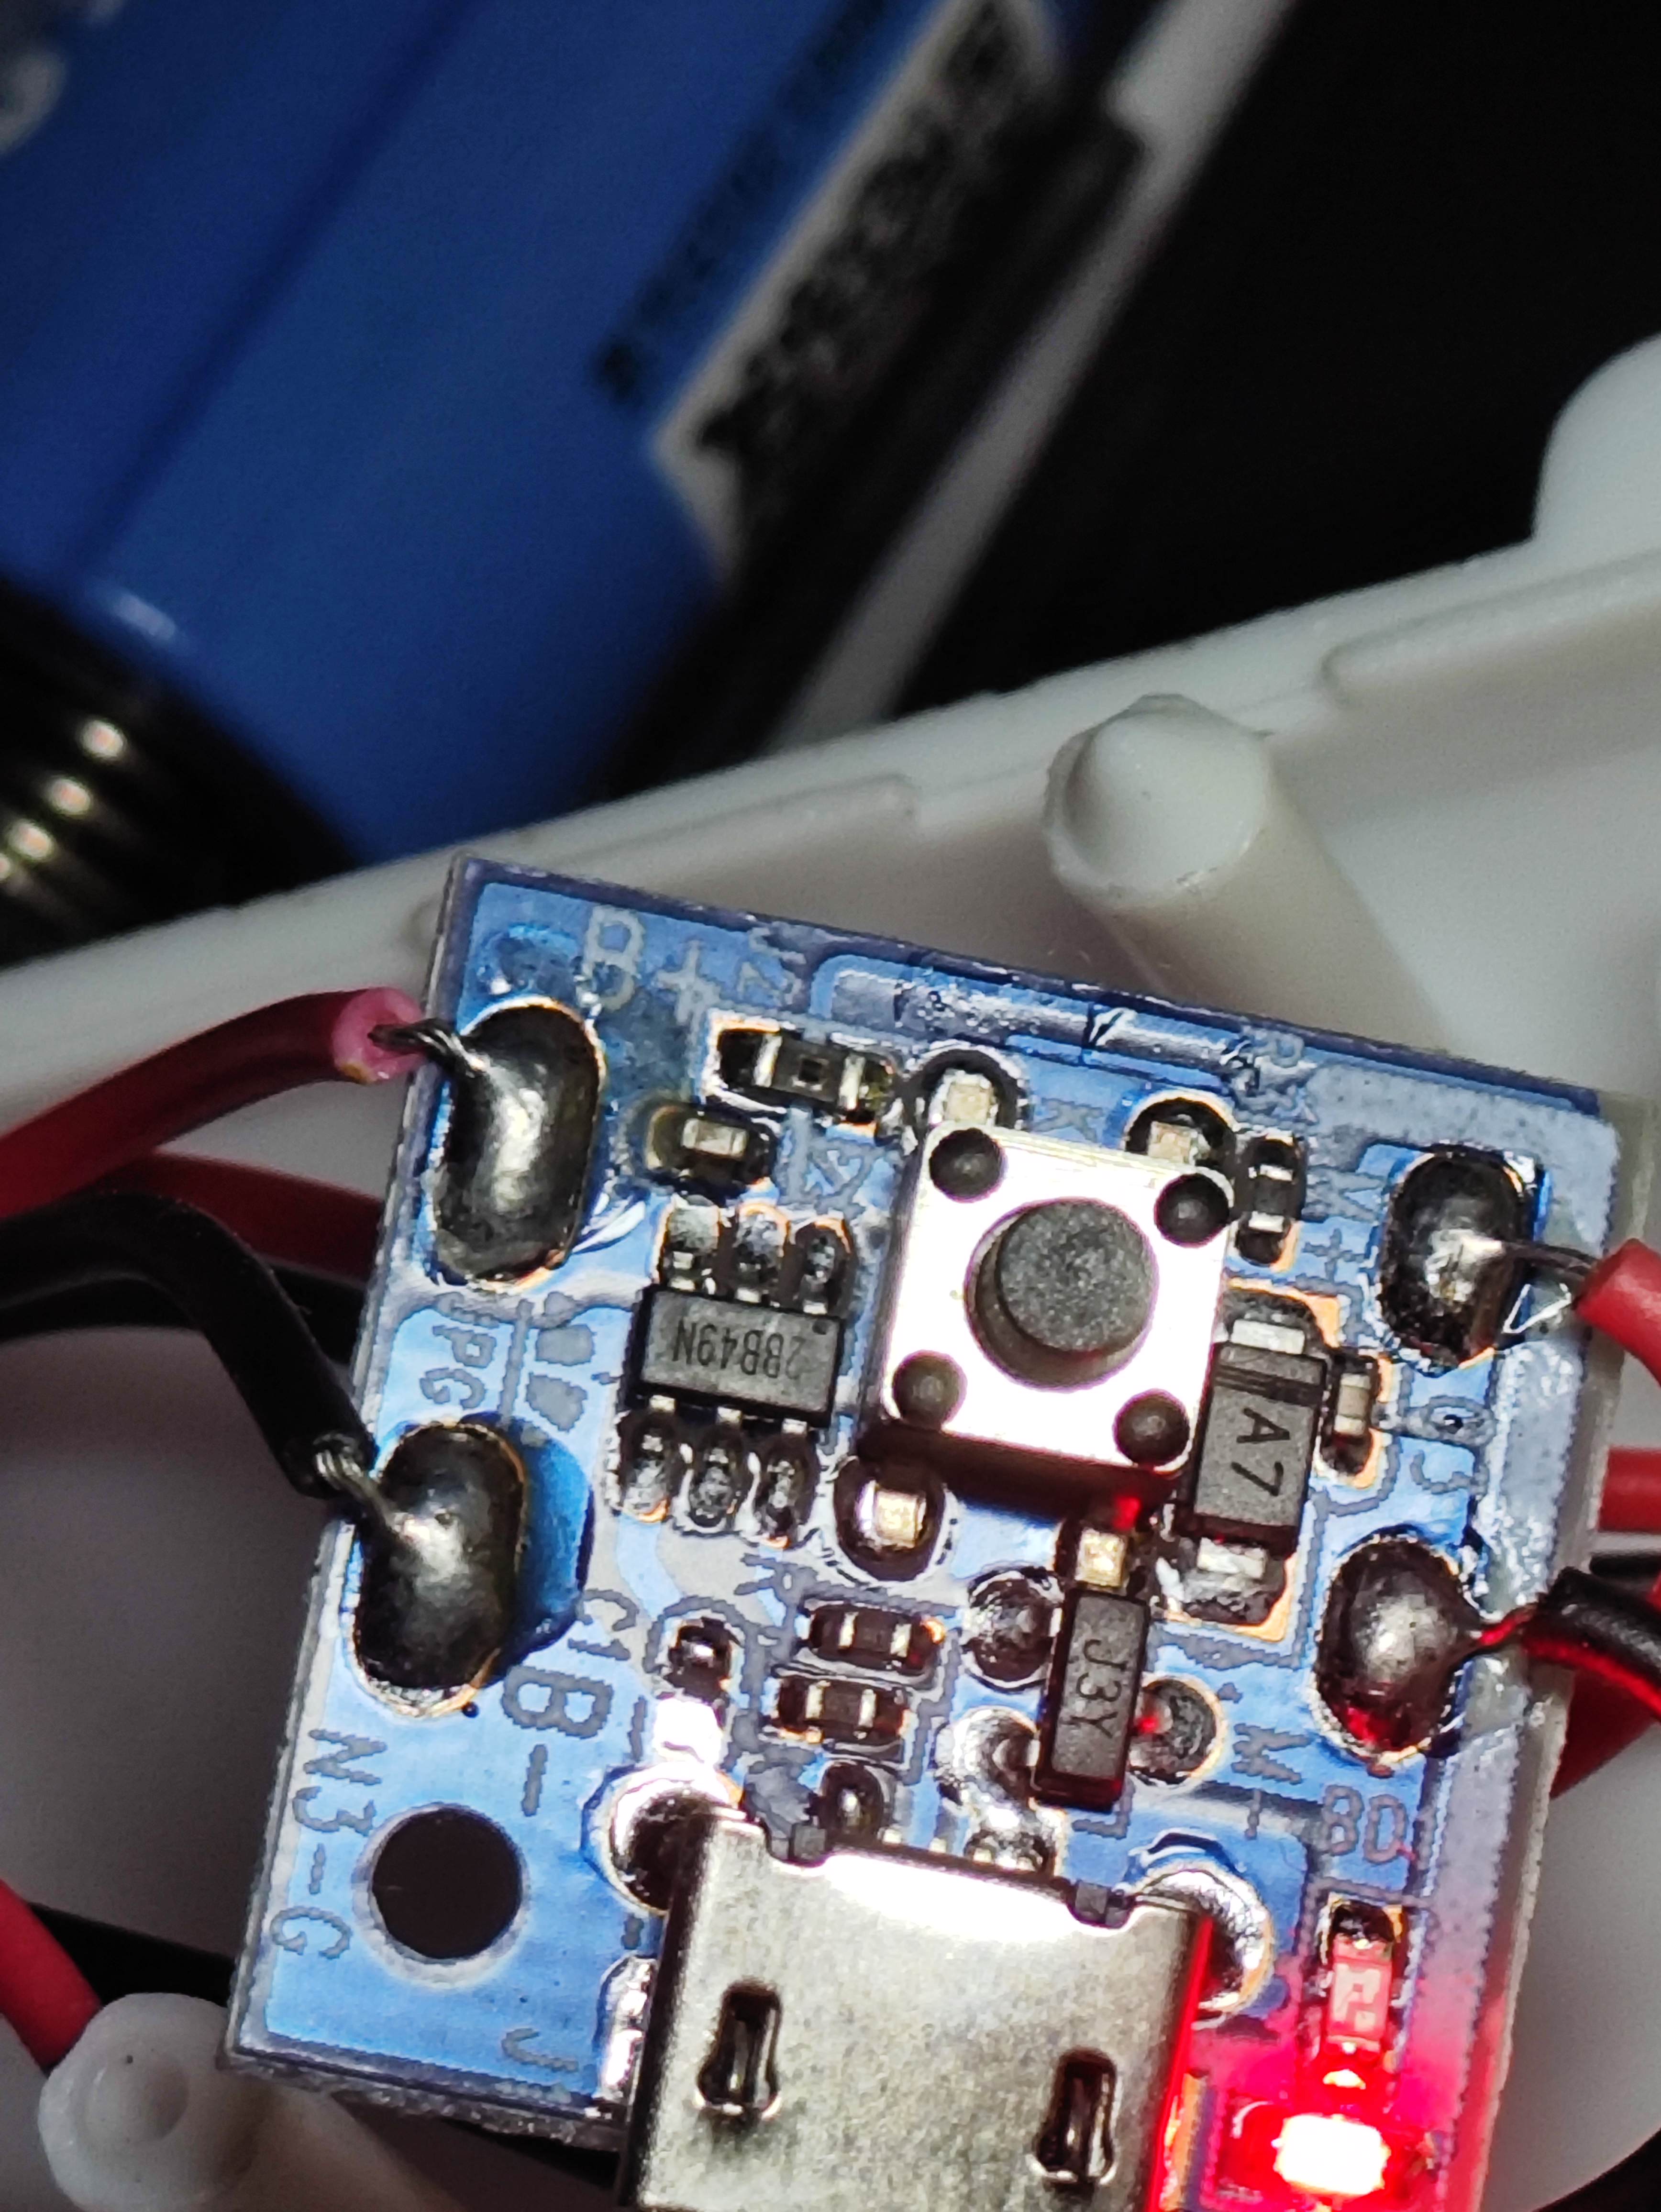
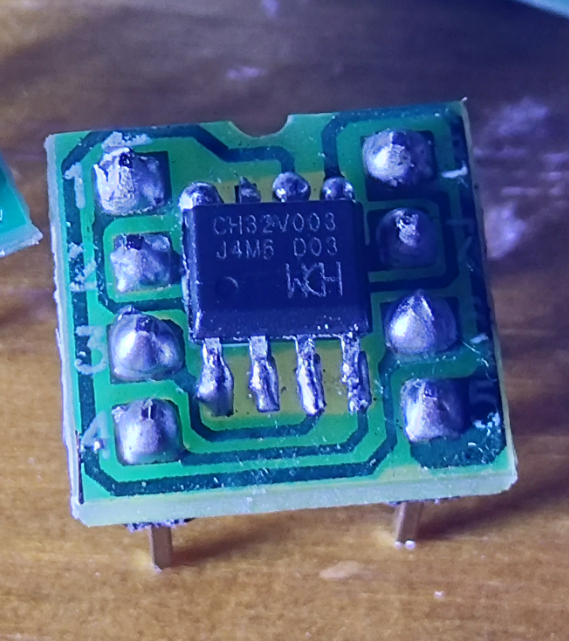
### ch32v003芯片若干

### 红外接收头

### 焊锡丝

### 漆包线,普通铜线也是可以的

### 焊芯片的小板子

### 遥控器

软件方面,先得给ch32v003写程序,主要内容是解析红外NEC编码,次要内容是单片机GPIO中断,网上都有,不再讲解贴一下解析NEC吧
```
u8 Infrared_Remote_Delay(void) {
u8 tim = 0;
while ( GPIO_ReadInputDataBit(IR_RECEIVER_PORT,IR_RECEIVER_PIN) == SET) {
tim++;
Delay_Us(20);
if (tim >= 250) {
return tim;
}
}
return tim;
}
u8 getCode(u32 inf_val){
u8 sta = 0;
u8 t1,t2;
t1 = inf_val >> 24;
t2 = (inf_val >> 16)&0xff;
// if(t1==(u8)\~t2)&&t1==REMOTE_ID){
if(t1==(u8)\~t2){
t1 = inf_val >> 8;
t2 = inf_val;
if(t1==(u8)\~t2) sta = t1;
}
return sta;
}
void EXTI7_0_IRQHandler(void) {
u8 high_time, flag, data = 0, n = 0;
if (EXTI_GetITStatus(EXTI_Line1) != RESET) {
// printf("Run at EXTI\\r\\n");
// 清除中断标志位
EXTI_ClearITPendingBit(EXTI_Line1);
inf_val = 0;
while (1) {
if (GPIO_ReadInputDataBit(IR_RECEIVER_PORT,IR_RECEIVER_PIN) == SET) {
high_time = Infrared_Remote_Delay();
if (high_time >= 250) break;
if (high_time >= 200 && high_time < 250) {
flag = 1;
}else
if (high_time >= 60 && high_time < 90) {
data = 1;
}else
if (high_time >= 10 && high_time < 50) {
data = 0;
}else{
break;
}
if (flag == SET) {
inf_val <<= 1;
inf_val += data;
if (n >= 32) {
inf_flag = 1;
break;
}
}
n++;
}
}
// u8 key = Remote_Scan(inf_val);
if(inf_val != 00000000 && inf_val != 0 && inf_val > 1000000){
u8 _code = getCode(inf_val);
printf("inf_val: %d\\r\\n",_code);
pressCode((int)_code);
}
}
}
```
### pressCode得到红外遥控code,就可以处理相应的动作,自己写switch方法,处理高低电平,下面是我的遥控处理
```
void pressCode(int code){
switch(code){
case 128:
printf("auto: 128\r\n");
break;
case 160:
printf("3H: 160\r\n");
GPIO_ResetBits( LP78080F_KEY_PORT, LP78080F_KEY_PIN);
break;
case 216:
printf("5H: 216\r\n");
GPIO_SetBits( LP78080F_KEY_PORT, LP78080F_KEY_PIN);
break;
case 192:
printf("8H: 192\r\n");
GPIO_WriteBit(LP78080F_KEY_PORT,LP78080F_KEY_PIN,SET);
break;
case 80:
printf("ON: 80\r\n");
GPIO_WriteBit(LP78080F_KEY_PORT,LP78080F_KEY_PIN,RESET);
break;
case 248:
printf("OFF: 248\r\n");
GPIO_SetBits( LP78080F_KEY_PORT, LP78080F_KEY_PIN);
Delay_Ms(500);
GPIO_WriteBit(LP78080F_KEY_PORT,LP78080F_KEY_PIN,RESET);
break;
case 224:
printf("白天:224\r\n");
break;
case 144:
printf("黑夜: 144\r\n");
break;
}
}
```
#### 芯片焊好写入程序
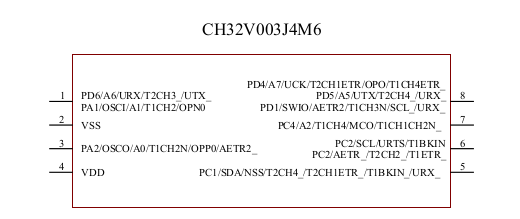
#### 芯片脚的接法
* ###### 风扇芯片LP78080F 第5脚接CH32V003单片机的PC4,用于控制电平高低
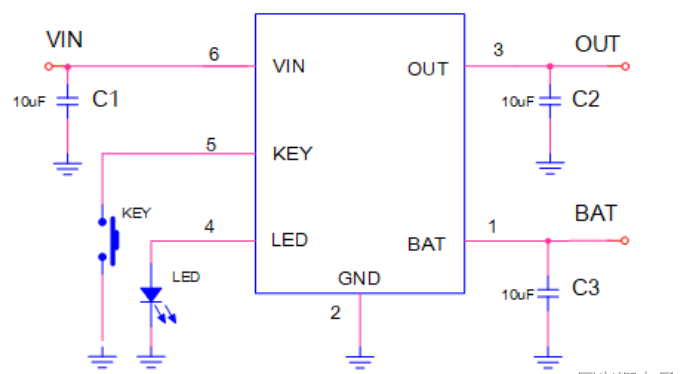
* ###### 5号脚PC1接红外接收器的数据引脚,2号脚接GND,4号脚接风扇芯片6号电源脚,7号脚接风扇的key脚(第5脚)
#### 我的焊接手法
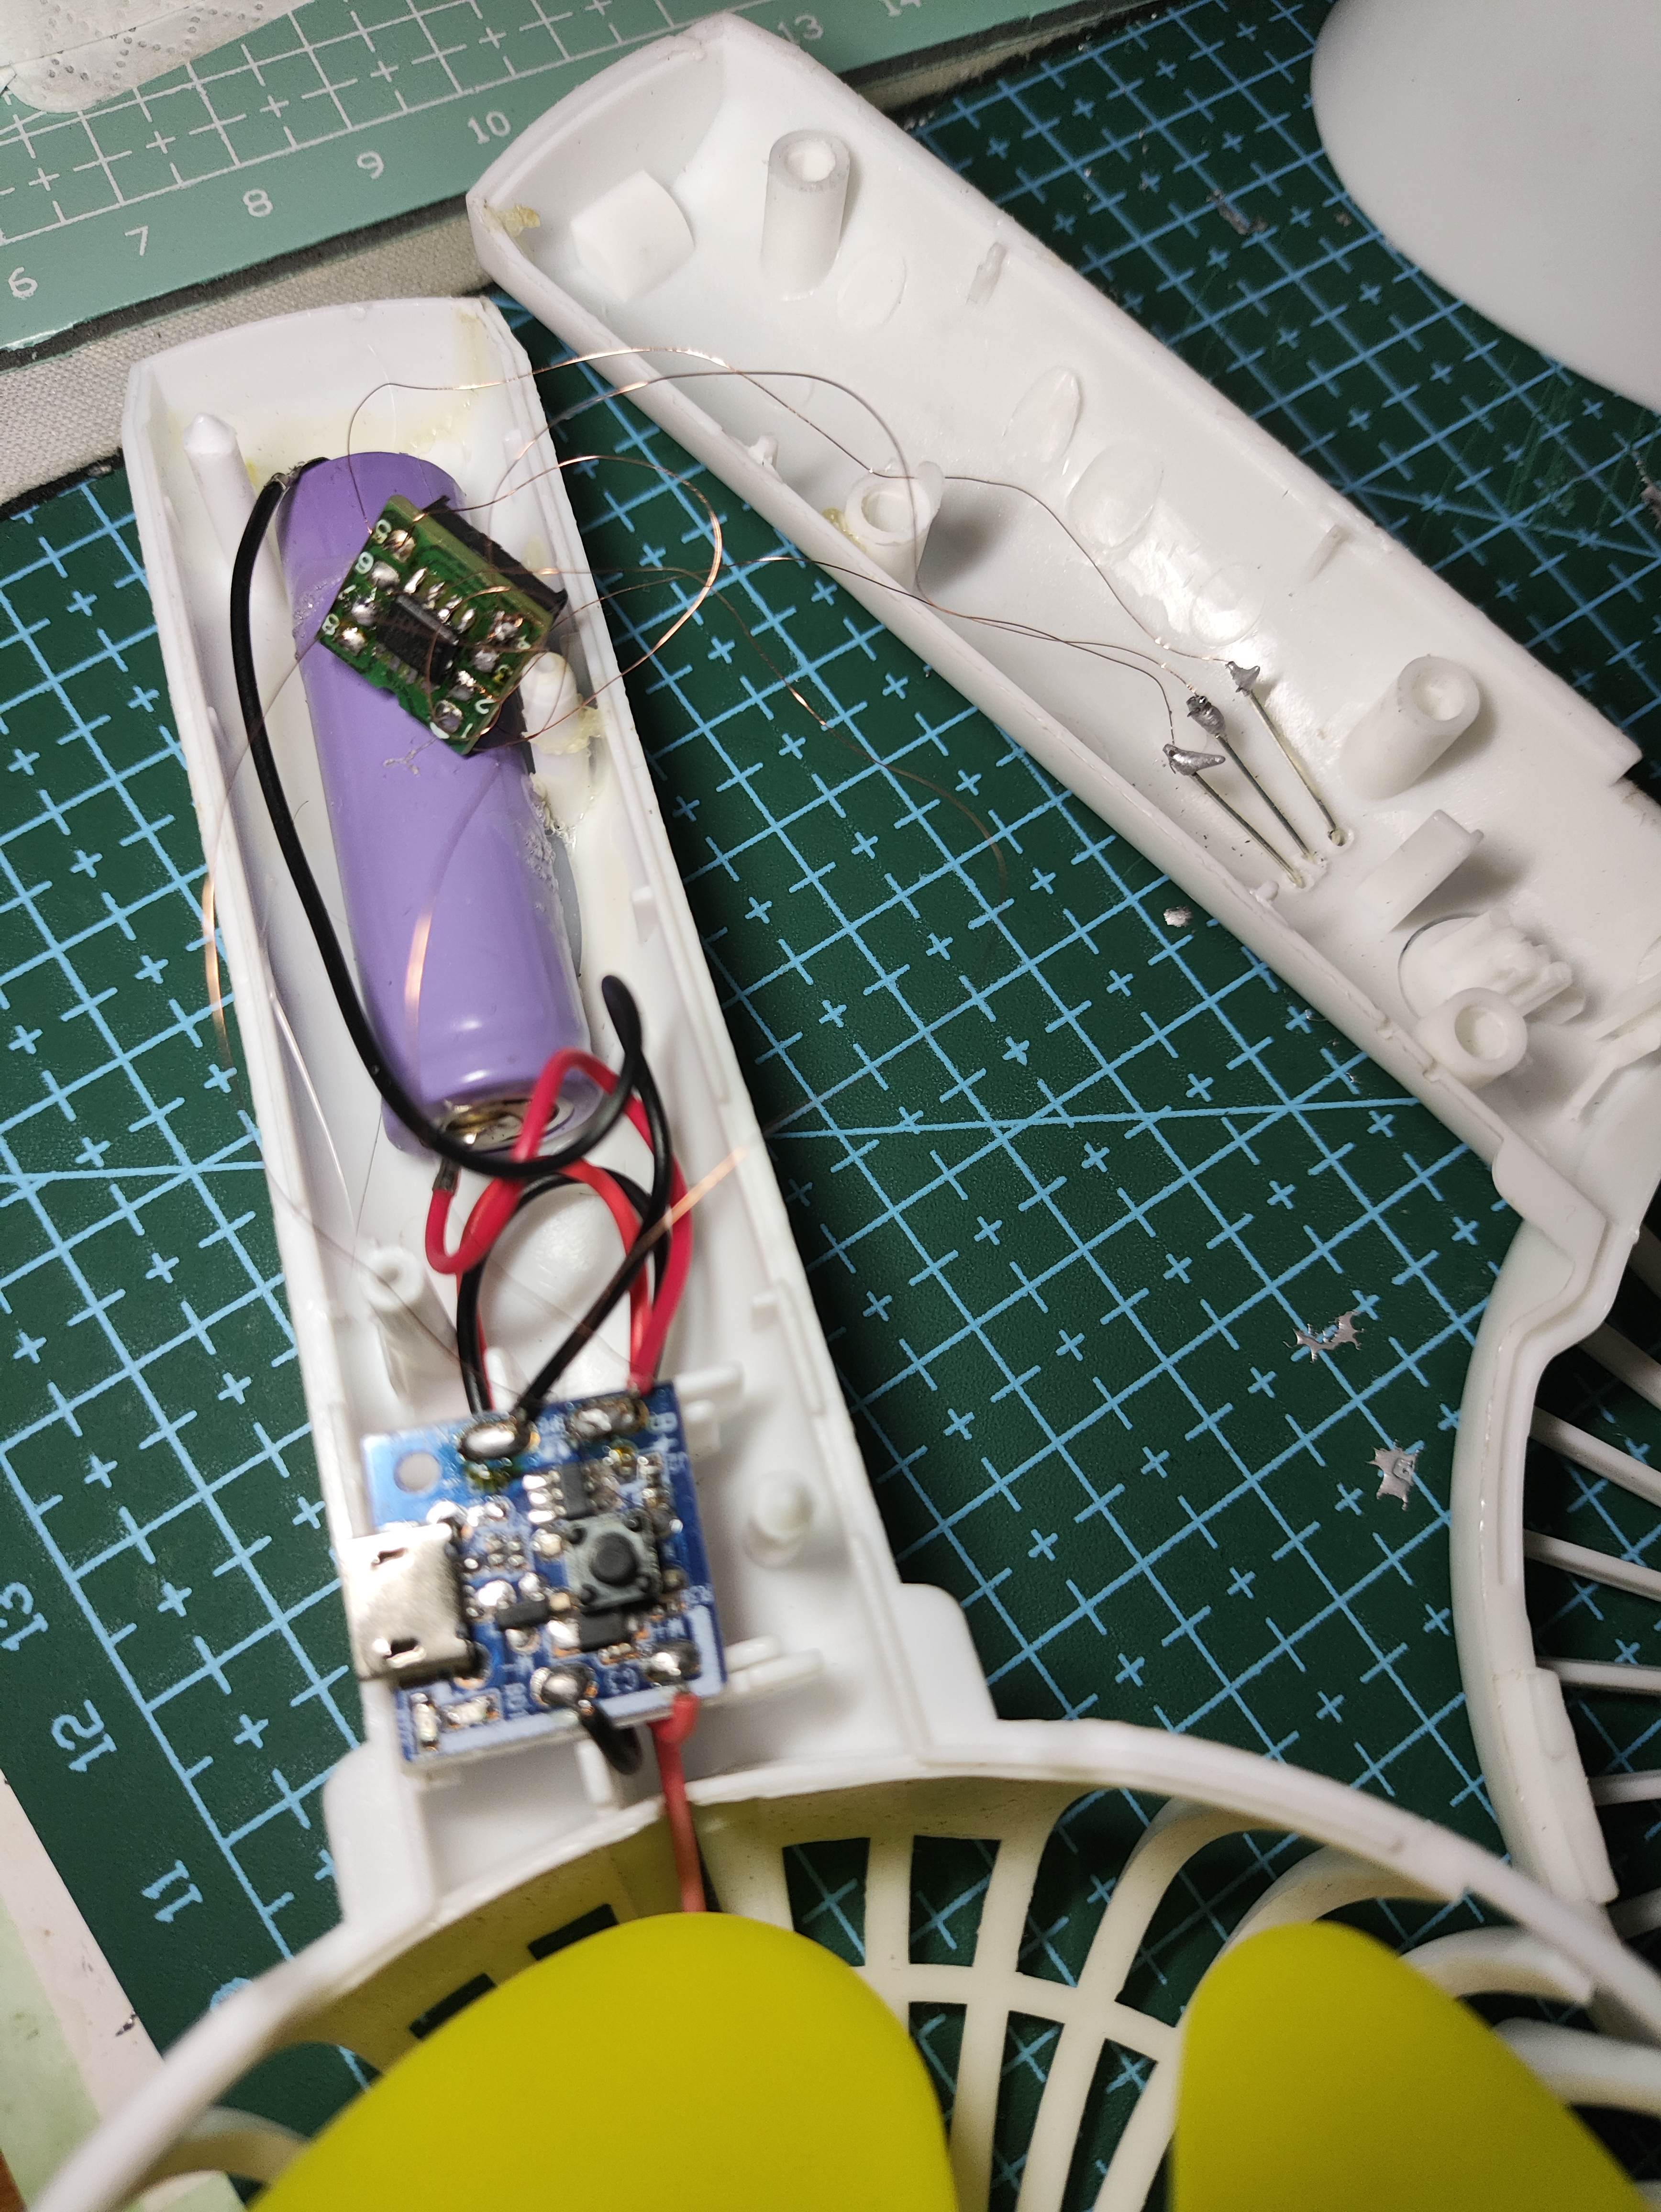
##### 大功告成,效果非常好,可以改12V的无刷风扇了
==========================end===================================
# 问题
* 加了芯片后感觉耗电非常快,ch32v003用cc表测有4ma电流,不太行,还得改进一下
# 引用
> https://baijiahao.baidu.com/s?id=1776822153317115485&wfr=spider&for=pc
> https://www.wch.cn/products/CH32V003.html
> https://blog.csdn.net/qq_42673988/article/details/110439317
## 准备:
### 小风扇一个,带电路板的12V的同理也可以这样改

### 小风扇电路小板

### ch32v003芯片若干

### 红外接收头

### 焊锡丝

### 漆包线,普通铜线也是可以的

### 焊芯片的小板子

### 遥控器

软件方面,先得给ch32v003写程序,主要内容是解析红外NEC编码,次要内容是单片机GPIO中断,网上都有,不再讲解贴一下解析NEC吧
```
u8 Infrared_Remote_Delay(void) {
u8 tim = 0;
while ( GPIO_ReadInputDataBit(IR_RECEIVER_PORT,IR_RECEIVER_PIN) == SET) {
tim++;
Delay_Us(20);
if (tim >= 250) {
return tim;
}
}
return tim;
}
u8 getCode(u32 inf_val){
u8 sta = 0;
u8 t1,t2;
t1 = inf_val >> 24;
t2 = (inf_val >> 16)&0xff;
// if(t1==(u8)\~t2)&&t1==REMOTE_ID){
if(t1==(u8)\~t2){
t1 = inf_val >> 8;
t2 = inf_val;
if(t1==(u8)\~t2) sta = t1;
}
return sta;
}
void EXTI7_0_IRQHandler(void) {
u8 high_time, flag, data = 0, n = 0;
if (EXTI_GetITStatus(EXTI_Line1) != RESET) {
// printf("Run at EXTI\\r\\n");
// 清除中断标志位
EXTI_ClearITPendingBit(EXTI_Line1);
inf_val = 0;
while (1) {
if (GPIO_ReadInputDataBit(IR_RECEIVER_PORT,IR_RECEIVER_PIN) == SET) {
high_time = Infrared_Remote_Delay();
if (high_time >= 250) break;
if (high_time >= 200 && high_time < 250) {
flag = 1;
}else
if (high_time >= 60 && high_time < 90) {
data = 1;
}else
if (high_time >= 10 && high_time < 50) {
data = 0;
}else{
break;
}
if (flag == SET) {
inf_val <<= 1;
inf_val += data;
if (n >= 32) {
inf_flag = 1;
break;
}
}
n++;
}
}
// u8 key = Remote_Scan(inf_val);
if(inf_val != 00000000 && inf_val != 0 && inf_val > 1000000){
u8 _code = getCode(inf_val);
printf("inf_val: %d\\r\\n",_code);
pressCode((int)_code);
}
}
}
```
### pressCode得到红外遥控code,就可以处理相应的动作,自己写switch方法,处理高低电平,下面是我的遥控处理
```
void pressCode(int code){
switch(code){
case 128:
printf("auto: 128\r\n");
break;
case 160:
printf("3H: 160\r\n");
GPIO_ResetBits( LP78080F_KEY_PORT, LP78080F_KEY_PIN);
break;
case 216:
printf("5H: 216\r\n");
GPIO_SetBits( LP78080F_KEY_PORT, LP78080F_KEY_PIN);
break;
case 192:
printf("8H: 192\r\n");
GPIO_WriteBit(LP78080F_KEY_PORT,LP78080F_KEY_PIN,SET);
break;
case 80:
printf("ON: 80\r\n");
GPIO_WriteBit(LP78080F_KEY_PORT,LP78080F_KEY_PIN,RESET);
break;
case 248:
printf("OFF: 248\r\n");
GPIO_SetBits( LP78080F_KEY_PORT, LP78080F_KEY_PIN);
Delay_Ms(500);
GPIO_WriteBit(LP78080F_KEY_PORT,LP78080F_KEY_PIN,RESET);
break;
case 224:
printf("白天:224\r\n");
break;
case 144:
printf("黑夜: 144\r\n");
break;
}
}
```
#### 芯片焊好写入程序

#### 芯片脚的接法
* ###### 风扇芯片LP78080F 第5脚接CH32V003单片机的PC4,用于控制电平高低

* ###### 5号脚PC1接红外接收器的数据引脚,2号脚接GND,4号脚接风扇芯片6号电源脚,7号脚接风扇的key脚(第5脚)

#### 我的焊接手法

##### 大功告成,效果非常好,可以改12V的无刷风扇了
==========================end===================================
# 问题
* 加了芯片后感觉耗电非常快,ch32v003用cc表测有4ma电流,不太行,还得改进一下
# 引用
> https://baijiahao.baidu.com/s?id=1776822153317115485&wfr=spider&for=pc
> https://www.wch.cn/products/CH32V003.html
> https://blog.csdn.net/qq_42673988/article/details/110439317
登录 或 注册 后可回复。