多谢楼主分享
树莓派3B 嵌入式 使用 Flutter-pi 运行 flutter 应用
[PeachT/Raspberry3B-Flutter-Embedded: 树莓派3B 使用 Flutter-pi 运行 flutter 应用 (github.com)](https://github.com/PeachT/Raspberry3B-Flutter-Embedded)
- 需要测试的同学编译好的文件到这里下载
# 树莓派3B 使用 Flutter-pi 运行 flutter 应用
- [https://github.com/ardera/flutter-pi](https://github.com/ardera/flutter-pi)
- 可以直接安装这个项目说明来就可以,下面只是个人的记录
--------------------
## 树莓派系统版本 aarch64
- 系统版本:[https://downloads.raspberrypi.org/raspios_lite_arm64/images/raspios_lite_arm64-2022-04-07/2022-04-04-raspios-bullseye-arm64-lite.img.xz](https://downloads.raspberrypi.org/raspios_lite_arm64/images/raspios_lite_arm64-2022-04-07/2022-04-04-raspios-bullseye-arm64-lite.img.xz)
- 只是做个简单的记录
- demo.tar.gz 是已经编译好了应用
```bash
tar -zxvf demo.tar.gz --strip-components 1 -C ~/my_app
```
- flutter.pi.tar.gz 编译好的flutter-pi
- 解压到/usr/lib
- 注意权限问题
- libflutter_engine.so 应该是 libflutter_engine.so.release 的连接,这里就不处理这个问题了。
```bash
sudo tar -zxvf flutterpi.tar.gz --strip-components 1 -C /usr/lib
cd /usr/lib
ls -l libflutter_engine.so*
-rwxr-xr-x 1 root root 12154520 Jun 29 11:25 libflutter_engine.so
-rwxr-xr-x 1 root root 33810936 Jun 29 11:25 libflutter_engine.so.debug
-rwxr-xr-x 1 root root 16701440 Jun 29 11:25 libflutter_engine.so.profile
-rwxr-xr-x 1 root root 12154520 Jun 29 11:25 libflutter_engine.so.release
ls -l icudtl.dat
-rwxr-xr-x 1 root root 10284336 Jun 29 11:25 icudtl.dat
ls -l flutter-pi
-rwxr-xr-x 1 root root 1087416 Jun 29 11:25 flutter-pi
```
- 运行
```bash
/usr/lib/flutter-pi ~/my_app
```
- 由于测试的时候安装了依赖
- 应该是用不到这么多的依赖的
```bash
sudo apt install cmake libgl1-mesa-dev libgles2-mesa-dev libegl1-mesa-dev libdrm-dev libgbm-dev ttf-mscorefonts-installer fontconfig libsystemd-dev libinput-dev libudev-dev libxkbcommon-dev
```
------------------------------
## 下面是编译过程的记录
## Win11 环境
```shell
>systeminfo
OS 名称: Microsoft Windows 11 专业版
OS 版本: 10.0.22000 暂缺 Build 22000
OS 制造商: Microsoft Corporation
OS 配置: 独立工作站
OS 构建类型: Multiprocessor Free
...
>flutter --version
Flutter 3.0.3 • channel stable • https://github.com/flutter/flutter.git
Framework • revision 676cefaaff (6 days ago) • 2022-06-22 11:34:49 -0700
Engine • revision ffe7b86a1e
Tools • Dart 2.17.5 • DevTools 2.12.2
```
## WSL2 环境 debian 11
```shell
> cat /etc/issue
Debian GNU/Linux 11
> uname -a
Linux 主机名 5.10.102.1-microsoft-standard-WSL2 #1 SMP Wed Mar 2 00:30:59 UTC 2022 x86_64 GNU/Linux
```
--------------------------
## 树莓派依赖 (树莓派中操作)
```shell
$ sudo apt install cmake libgl1-mesa-dev libgles2-mesa-dev libegl1-mesa-dev libdrm-dev libgbm-dev ttf-mscorefonts-installer fontconfig libsystemd-dev libinput-dev libudev-dev libxkbcommon-dev
```
- 字体更新
```shell
sudo fc-cache
```
## 树莓派中安装 Fluuter-pi
- 在树莓派中操作
1. 克隆源码
```shell
git clone https://github.com/ardera/flutter-pi
cd flutter-pi
```
2. 编译
- 在 flutter-pi 目录下操作
- 这里需要科学上网(不然编译不过去)
```shell
mkdir build && cd build
cmake ..
make
```
3. 安装
```shell
sudo make install
```
- 安装问题应该会的到一个 flutter-pi 的命令
## 树莓派的设置
- 懒得写了复制的 做个记录吧
1. Open raspi-config:
```shell
sudo raspi-config
```
2. Switch to console mode:
`System Options -> Boot / Auto Login` and select `Console` or `Console (Autologin)`.
3. *Raspbian buster only, skip this if you're on bullseye*
Enable the V3D graphics driver:
`Advanced Options -> GL Driver -> GL (Fake KMS)`
4. Configure the GPU memory
`Performance Options -> GPU Memory` and enter `64`.
5. Leave `raspi-config`.
6. Give the `pi` permission to use 3D acceleration. (**NOTE:** potential security hazard. If you don't want to do this, launch `flutter-pi` using `sudo` instead.)
```shell
usermod -a -G render pi
```
7. Finish and reboot.
-----------------------------
## 创建与编译项目(win11中操作)
- 在 Win11 中操作
1. 创建 Flutter 项目 (安装正常创建就好)
```shell
flutter create my_app
cd my-app
```
2. 编译项目
```shell
flutter build bundle
```
3. 生成 kernel_snapshot.dill 文件
- 命令目录根据实际情况填写
```shell
E:\flutter\bin\cache\dart-sdk\bin\dart.exe E:\flutter\bin\cache\dart-sdk\bin\snapshots\frontend_server.dart.snapshot --sdk-root E:\flutter\bin\cache\artifacts\engine\common\flutter_patched_sdk_product --target=flutter --aot --tfa -Ddart.vm.product=true --packages .packages --output-dill build\kernel_snapshot.dill --verbose --depfile build\kernel_snapshot.d package:my_app/main.dart
```
- 编译完成后会生成 ./build
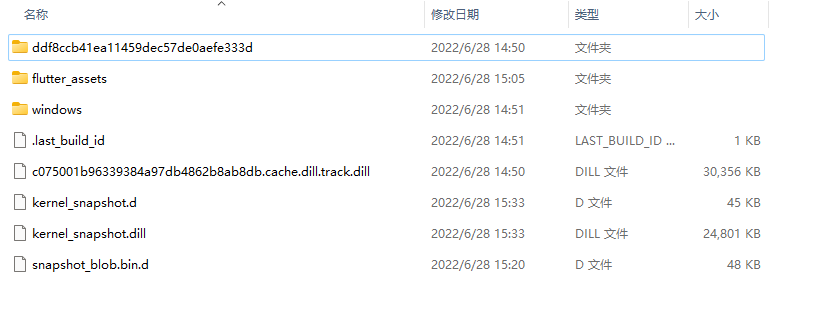
- 这个目录中的所有文件复制到 WSL2 中
- ## ./build 这个目录中的所有文件复制到 WSL2 中
-------------------------------
## 创建 app.so (WSL2 中操作)
1. 克隆编译好的工具
- 需要用到这个项目中的 gen_snapshot_linux_x64_release
```shell
git clone https://github.com/ardera/flutter-engine-binaries-for-arm.git engine-binaries
```
2. 需要在复制过来的目录下操作
- ./engine-binaries/arm64/gen_snapshot_linux_x64_release 这个放在就去哪找
- --elf=build/flutter_assets/app.so (app.so生成的目录建议不要动)
- build/kernel_snapshot.dill (建议不要动)
- --sim-use-hardfp (github项目中需要这个,在我操作的时候不能用这个选项,issues 中也有人问到了这个问题)
```shell
**/gen_snapshot_linux_x64_release --deterministic --snapshot_kind=app-aot-elf --elf=build/flutter_assets/app.so --strip --sim-use-hardfp build/kernel_snapshot.dill
```
- 如果没有什么问题应该得到如下目录
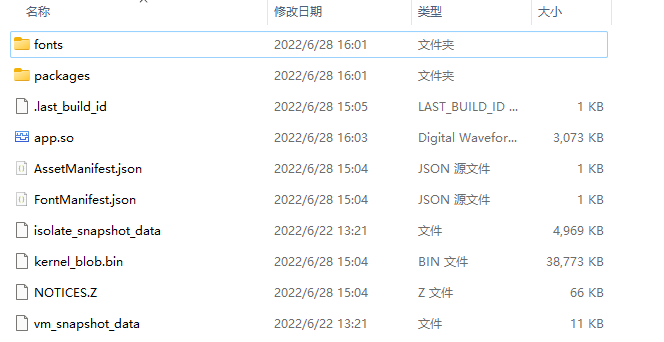
- 将所有内容复制到树莓派中
```shell
rsync -a --info=progress2 ./build/flutter_assets/ pi@raspberrypi:/home/pi/my_apps
```
## 运行(树莓派中操作)
- 运行复制过来的目录
```shell
flutter-pi /home/pi/my_apps
```
登录 或 注册 后可回复。
